geo1007-labinstructions
GEO1007 - Installation guideline for FROST Server on Apache Tomcat
This guideline will explain where to download and how to install FROST Server. As with our earlier installation of Geoserver, you will deploy the FROST server on Apache Tomcat.
Download and Install FROST Server
FROST is also installed as .war file, the convenient web
archive build format that allows for relatively straight forward deployment:
-
Download the FROST-Server.HTTP-2.3.1.war file
-
Place the
.waringeo1007/apache-tomcat-<version>/webapps.
💡 Additional Info: What are .war.asc, .war.md5, .war.sha1 files?
You’ll notice that the FROST repository has many formats available for download, not just the
.warwe will be using. Each of these other formats has three other small files associated with them:.asc,.md5and.sha1. These files are checksum files used to verify the integrity of downloaded files (which can be performed by a program like md5sum).
Copy Over Database JARs and Setup Context
FROST will need some Java modules to handle connections with
our PostgreSQL + PostGIS database. To not create potential version conflicts, and since Geoserver needed the same set of files, copy over postgresql-42.7.5.jar and gt-jdbc-postgis-33.0.jar from .../geo1007/apache-tomcat-<version>/webapps/geoserver/WEB-INF/lib into .../geo1007/apache-tomcat-<version>/webapps/FROST-Server.HTTP-2.3.1/WEB-INF/lib. Next, lets make the empty database:
-
Create your database however you wish, but name it sensorthings-sample. If you are using pgAdmin4, right click from the left hand browser pane on
DatabasesandCreate → Database -
Startup your Tomcat server, it should unpack the
.warfile and deploy. You should now see the directory of the FROST installation:geo1007/apache-tomcat-<version>/webapps/FROST-Server.HTTP-2.3.1. Browse this directory and into theMETA-INFdirectory. -
In this directory, open (in a text editor) the
context.xml -
Replace the content of the file with the following changing the username and password embedded in his code block to match your database password:
<?xml version="1.0" encoding="UTF-8"?>
<Context path="/FROST-Server.HTTP-2.3.1">
    <Parameter override="false" name="serviceRootUrl" value="http://localhost:8080/FROST-Server.HTTP-2.3.1" />

    <Parameter override="false" name="persistence.persistenceManagerImplementationClass" value="de.fraunhofer.iosb.ilt.frostserver.persistence.pgjooq.PostgresPersistenceManager" />
    <Parameter override="false" name="persistence.idGenerationMode" value="ServerGeneratedOnly" />
    <Parameter override="false" name="persistence.autoUpdateDatabase" value="false" />
    <Parameter override="false" name="persistence.db_jndi_datasource" value="jdbc/sensorthings-sample" />
    <Resource
        name="jdbc/sensorthings-sample" auth="Container"
        type="javax.sql.DataSource" driverClassName="org.postgresql.Driver"
        url="jdbc:postgresql://localhost:5432/sensorthings-sample"
        username="<username>" password="<password>"
        maxTotal="20" maxIdle="10" maxWaitMillis="-1"
        defaultAutoCommit="false"
    />
</Context>
Make the Database Connection and Update
Now you will update and connect your sensorthings-sample database to the FROST
server. Navigate to http://localhost:8080/FROST-Server.HTTP-2.3.1/DatabaseStatus
This update process will also create the table schemas which comply
with the datamodel in the OGC SensorThings API. Perform the update by:
-
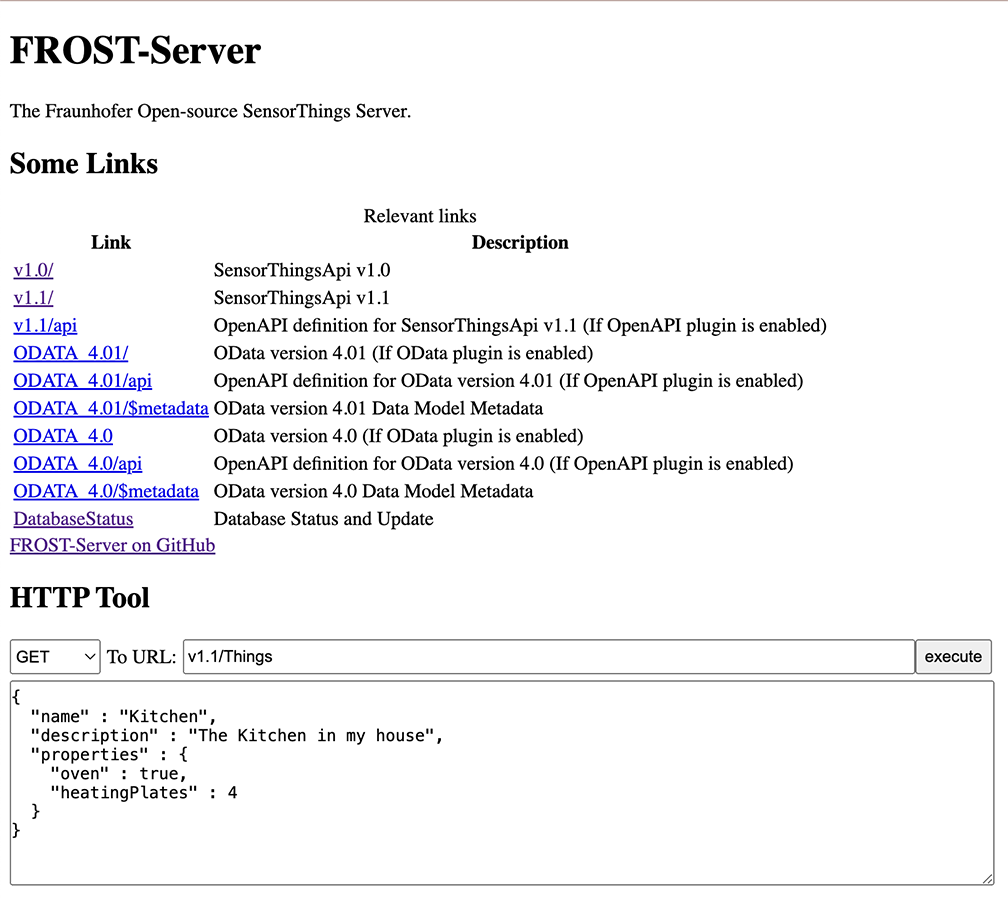
Navigate over to http://localhost:8080/FROST-Server.HTTP-2.3.1/ You should see the following image:
-
On this page, click on
Database Statusand nextDo update, it should say “Update complete”. -
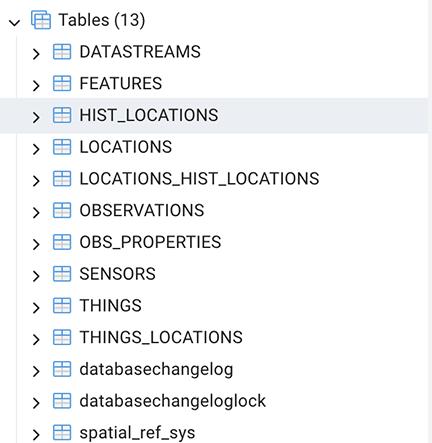
To confirm that the database configuration is working well, back on pgAdmin4, navigate to the
sensorthings-sample→Schemas→Tableswhere you should see the OGC SensorThings API schema